Showing posts with label AssignmentWeek2. Show all posts

Sunday, March 2, 2014

Grow and Shrink!

In refining my prototype this week, I focused on three things:
  1. making the periscopes more enclosing (nose hole, blocking peripheral vision, etc.) so that the user would only see the intended view.
  2. three versions (.5 foot, 1 foot, and 2 feet), so that users can grow/ shrink different amounts.
  3. handles so users can hold each periscope with one hand.
In my user testing during the week, when handed the periscopes without instructions, many people would look through the PVC pipe handles or the big mirror in the front of the periscope instead of using the eye slit as was intended. In order to account for this, I created more obvious signage of where to look and how to hold. I made yellow signs say "shrink" and the green signs say "grow" (matching the handles you're supposed to hold for shrinking and growing, respectively). Both signs have arrows that point to the eye slit. I also covered the opening of the PVC pipes. The 2 ft periscope was difficult to hold with a PVC pipe, so I made handles instead.

At the Exploratorium on Friday, this was my original set up. The periscopes were laid flat on the table. The whiteboard says "Try each of the periscopes to grow and shrink. Do you see the world differently?" and "While holding a periscope, give a partner a high-5. Is it harder than you thought?"

However, I found that most people just looked at it, maybe touched it, but didn't know what to do. Because the periscopes were laid flat on the table, a lot of people (yes, adults included) bent down to look through the slit and then quickly left when all they saw was the white table. One group of people STILL tried to look through the PVC pipes even though they were covered.

When I moved outside, I replaced the "grow" and "shrink" signs with "Look here" to make the action more obvious. To better invite people to pick up the periscopes, I propped them up on the table. I also made the sign more straightforward.  

These slight alterations worked pretty well. These two boys were engaged with the exhibit, largely on their own:

The handles were a problem, however, especially for the 2 feet periscope. Even this Explainer got his arm crossed a bit... Furthermore, a lot of people (including this Explaner) told me that the large periscope "worked best," and that the smaller ones "didn't work for me." The idea of different heights did not resonate with many people.

Here are some typical use cases:


I then discovered this hoops exhibit, and approached some kids to try using the periscopes instead of the provided glasses. This allowed kids, especially, to be more engaged with the periscopes, instead of just looking for 20 seconds and walking away.


This group of boys REALLY got into it.

These two guys got really into it, and must have stayed playing with the hoops & periscopes for 5 minutes. After mastering the exhibit, they moved back a few feet for the expert level. 

The handles problem still remained, however. These girls had a tough time figuring out where exactly the hold the periscopes. I imagine they might have given up if I wasn't standing there offering prompts.

This was the final iteration of my sign. I thought it worked well! It's amazing how much people need to be instructed on what to do. People didn't start walking around with the periscopes until I wrote "Walk around."

Changes for this week:
1. Get rid of the 2 feet periscope. People loved it, but it was heavy/ awkward to hold, and most importantly, had a different affordance for holding than the other two periscopes. I don't think the additional slope on the learning curve is worth it. Most visitors also only tried two periscopes, not all three.
2. Better affordances & signage for holding and viewing with the periscopes. I had to instruct a lot of people to "flip it around" or "turn it upside down" or "look through the slit." A lot of people also didn't realize there were handles, even though they were green and yellow and had hands drawn on them. I'm thinking about ways I can enlarge the eye slit, using more symbols (arrows and pictures of eyes) instead of words. Perhaps a diagram of someone holding the periscope would be helpful in helping visitors discover the handles.
3. Either create a rack or modify the shape of the periscopes so that they will always stand upright (so people will pick them up).

In general, it was really cool being on the floor of the exhibit, and see how people respond to the pieces they've never seen before & have no background information about. 

It was cool seeing what parts of exhibits enthrall kids. ...Like the sculpture these girls made on Dan's exhibit (quite impressive...).

Exhausting day, but happy to spend it with you all! :)

Friday, February 28, 2014

Grow & shrink periscopes, sketches #2

Added multiple sizes (.5, 1, 1.5 feet), handles, blockages, and signage.

Monday, February 17, 2014

Wear me: grow & shrink!

 
Seeing the world kid level (- 1 foot)

Seeing the world as an adult (+ 1 foot)

(Thanks for the photos, Emily!)

Inspired by a wearable mirrors piece, I tried to prototype a different way of seeing the world. There's a lot of parent and kid pairs who visit the Exploratorium, and I thought I'd take advantage of that, to allow kids to see the world from an adult's perspective, and for adults to remember what it's like to be a kid. I visited Singapore this winter break for the first time after 15 years. This time, all the buildings seemed to have shrunk! I wanted to capture the wonder of that experience with clarity and without the requisite time delay. ...kinda like that stuff Alice eats when she's in wonderland!

Ideally, parent and child would put on their respective periscope and observe their surroundings. I can imagine conversations like "wow, everything seems so short!" or "huh, everything looks different from down here." I hope that this exhibit can teach the skill of observing the world carefully and reexamining assumptions that there's only one way of seeing things. Dan brought up an interesting idea of introducing discussion questions about common tall-person or short-person problems: for example, being tall, it's harder to judge what is an average height, because you can't use your own height as a standard.

Building this exhibit, I didn't know what a periscope is and that the mirrors are supposed to be in 45 degree angles. Leaving the piece unenclosed was also a problem because it introduced distracting images into the scene. My next iteration will be enclosed and include more ergonomically friendly parts.

Moving forward, I'm thinking more about how to design the user interaction so that it's more than a regular periscope - e.g. http://www.amazon.com/Green-Periscope-Wide-Field-View/dp/B00A5X1RNG/ I'm thinking more about how to create the illusion of actually feeling taller or shorter, perhaps taking into account how you have to move your head up for a child and down as an adult. I'd also like to play with taller-shorter interactions. I'm thinking about the possibilities of having users perform actions (e.g. picking up objects, going through small spaces) to help them get into their new point of view. There is a tension and disparity between what is seen and what is real. For example, wearing the get-taller periscope and reaching for objects, I have to reach higher than I think I have to because my brain thinks I'm taller than I am. I'm wondering how to play with this tension while playing with the shrinking/ growing Wonderland illusion.


All Eyes on You

Prototype of all eyes on you.

(It was calibrated to Obama's eyes...)

The wall of my room normally. 

My wall through the glasses.


This exhibit was inspired by the "All Eyes on Me" exhibit at the Exploratorium. "All Eyes on Me" is very much a solo experience. It's one person sitting in front of what looks like a dressing mirror. I wanted to explore a wearable piece that resembles a mask of eyes. I thought it could be quite a creepy experience. The wearer and the viewer also have very distinct experiences. Whereas the viewer sees a number of eyes of the wearer, the wearer sees three images of the world in front of them in stereo. I liked the idea of exploring different ways of seeing the world. It kinda resembles a wearable kaleidoscope.

This exhibit extends the idea of the mirror hat in emotional & perceptual responses to wearable mirror pieces. Whereas the hat only gave the viewer an opportunity to experience the mirrors, this mask/ glasses-like piece gives the wearer an interesting experience as well.

Ideally, two people visiting the museum together would discover this exhibit. One would put the piece on. The wearer would be disoriented but fascinated by this different way of seeing the world. The viewer would also be taken aback and surprised by the number of eyes suddenly all staring at her. During this process, they would be talking to each other about what they see, and be eager to switch roles. This perceptual engagement would encourage them to figure out why they see what they see.

Adjusting for distance between eyes was a problem encountered. It was built for Obama, so my eyes didn't show up properly. Unlike the All Eyes on Me exhibit, this one would require the cooperation of two people to "calibrate" the position of the glasses/ mask.

Moving forward, I would make the mirrors smaller and increase the number of mirrors so there would be even more eyes staring at you. I would also put a normal mirror by the exhibit so that solo visitors could see themselves if they angled the piece.

Wednesday, January 22, 2014

Pseudoscope


For my first exhibit design, I built a pseudoscope. I was not aware of this name at the time, but I thought it would be interesting to try to walk around with your eye positions swapped. The desired effect is to flip depth perception.
I was inspired by an exhibit at the exploratorium outside the room where we sat and drew. It took headphones and connected them to tubes that crossed over the wearer's head so that sounds from the left would come in the right side and vice versa.

In building the device, I centered the mirrors based on my own interocular distance, then set the angles of the mirrors to focus on an object roughly 6 ft away.

I was able to visually focus on an object pretty easily through this pseudoscope, but getting the desired depth perception flip was difficult at best. Most people who tried it out didn't know what was supposed to happen or exactly how to interact with the scope. Even with this knowledge, the quality of the mirrors and the set focal point made achieving the effect difficult.

There are a number of ways this piece could be improved:
I would like to make it more obvious how to use it. Affordances like a notch for your nose would be a good start, but it would also be nice to make the entire thing wearable, like a pair of glasses.
Improve the mirrors. Front surface mirror material, and mirrors of better surface quality would greatly improve the effect.

I would also like to try out some alternative geometries, like a hyper-stereo viewer, or glasses that use two periscopes in series to bring each eye back to it's original position except that the light has to go through a long tube to reach the eye, making everything look farther away than it really is.

A Peek Into Infinity

This project was inspired by the Infinity room exhibit by Yayoi Kusama. The exhibit in its current form is made up of six square plane mirrors that are stuck together with a combination of hot glue and masking tape. Each plane mirror has a red, green and yellow LED wired in series with a resistance to limit the voltage. One corner of the cube has been cut off to allow the participant to peer in and flip the switch to turn the LEDs on. Earlier all 18 lights were wired to light up when the exhibit was turned on, however I noticed that it was far too bright and decided only 3 lights were sufficient.

The cube in all its painters tape glory
Learning to use LEDs


The ideal interaction in this version of the prototype is to lift the box up when the lights are off and then to switch the lights to see the infinite effect. I noticed people smiled or were rapt when they switched the lights on. A lot of my friends wanted to take pictures of the effect with their phones. I am fascinated by infinity and would like to showcase its wonder in a memorable way. Many people mentioned it looked like a never ending christmas.
Lights On
Lights Off

The first step to improving this exhibit is improving the craft of the finished cube. I learnt that fixing the sides together with glue is very messy and tarnishes the final effect. I would like to cut the plane mirrors in a way that allows the pieces to fit together without glue.

This exhibit is very limited by its small size. I would really like to recreate the box in a human scale, where a person can walk into the room and control the lights by stepping on different panels.

I feel this exhibit lacks the interactive and social elements that make exhibits successful. The user does nothing except peer in after switching the lights on. John noticed a very neat effect when he pushed on the walls of the box. The infinite rows of light had a pulsing motion that looked very cool. I would like to add a level of interactivity by making the lights on the different sides switch on and off depending on certain actions by the user. Kind of creating an infinite disco of sorts. 
Hot glue and Painters Tape


I really enjoyed the interactive nature of many of the exhibits in the class. Clementine's glasses were particularly fun to play with and and walk around. Emily's try it yourself idea was also something that I enjoyed.amazing and am curious about designing an exhibit around that. Some of the other 

This weekend I was up in Lake Tahoe and noticed how light reflected in the water. I think this is really amazing and am curious about designing an exhibit around that. Some of the other things that come to mind is the effect achieved in Coldplay's Myloto Xyloto tour when they handed out light wristbands in the audience, making them part of the spectacle.
Water


I really would like to try and create an Infinity room kind of immersive exhibit where the participants are truly interacting with the environment.


Tuesday, January 21, 2014

Spinning mirror hat

Jennifer wearing the spinning mirror hat

The spinning mirror hat is intended to be a wearable mirror that attracts the attention of the people around you. It forces social interaction because you don't know what's happening on top of your head, and need someone else to explain what's happening to you. It's also an exploration of self-excluding and includingness. You can rotate it such that the person you're talking to sees themselves or doesn't.

Next steps:
- Make the experience more rewarding for the hat wearer. Perhaps it could be some sort of backwards hat, where the mirrors go down in front of the wearer's face.
- Add mirrors to both sides of the "hat" so that the wearer and people around her can both experience the self-excluding and including mirrors. This way, sometimes, the viewer would see his face in place of the wearer's, and sometimes the wearer would have no face.
- It would be cool if all the mirrors were either self including or self excluding, and turning the hat changes the angles of all mirrors. I think this would be a more powerful illustration of self-including/ excludingness than the gradient of my prototype.
- Make it easier to spin the hat, perhaps by adding a long stick and making the part that turns lighter (don't turn all the mirrors).

Ideas:
- Make it huge. Enter a room of self-including/ excluding mirrors. It might be scary to see so many of yourself and then they all disappear with the push of a button.
- Play with light and mirror reflections (e.g. when someone accidentally shines their watch into your eyes). When walking back to my dorm with my hat, there were a lot of interesting patterns on the ground because of sunlight bouncing off all the mirrors.

Starry Kaleidoscope


 I thought it was interesting when I noticed during our drawing session last week that rotating the paper below the mirrors somehow had a very nice animated kaleidoscope effect, and I wanted to design an exhibition where people could not only observe how different arrangements of mirrors would result in different patterns, but also have fun seeing a smooth animation-like warping of a painted nightsky under their feet.
Ideal Interaction: I would actually want this to be a large scale exhibition, where people could push the painted wheel below and adjust it's spinning speed, and walk around looking into the different mirrors. The photo below shows the approximate scale I would like it to be.


As said above, if I were going to use this as my final project, I would definitely rebuild it completely because of the scale to say the least. After hearing the advice given and looking back on the process, I think I also definitely should have still made the model bigger at first, because the hinges I made were too small and easily came loose just because the glue melted it. I would also try other alternatives of making actual curved mirrors to contrast with the multipaneled curve-approximating mirrors, thought I think those worked surprisingly well!

I actually spent a whole night in Room 36 first trying to make curved mirrors with the exact curvature I wanted, but the methods I tried resulted in extreme wrinkles in the materials which did not have strong enough reflective properties to achieve the kaleidoscope effect. However a TA suggested a method that I think might work now I know how to use the tools in the woodshop-- using the spinning sandpaper mills in the woodshop to carve wood into curves, then melting clear acrylic sheets over them before trying to put mylar on these smoother surfaces.

Reflections on reflections: After seeing Clementine's project, I thought it would be really cool if there could be an exhibition that adjusted the "height" of the viewer-- where you would still be looking forwards but at a different height. I think it would be really powerful for adults to see the world from a 4-feet high perspective, and children would probably love to experience what it feels like "up there". I'd love to experiment with something like that!

Mirrors: "Why the Long Face?"

"Why the Long Face?" (An Exploration of Mirror Anamorphosis)

Project in a Nutshell: My project exhibited anamorphic images, which are distorted images that become comprehensible at certain angles or when reflected in curved mirrors.

Conception and Evolution:  I was initially inspired to create an exhibit on reflections when I thought back to an art project I did in high school in which I drew a colored pencil still life of my reflection in an ornament. I remembered how the warping of my face changed depending on the distance of my face from the ornament, and I noted that unlike a marble, my image was not flipped upside-down. Whereas the ornament warped my face in the art piece, I did the reverse for my exhibit prototype: the actual images were warped, but took on their true form in the cylindrical reflection.

Ideal Interaction: When I created the prototype I wanted to incorporate user interaction so I have one mirror set-up that says "try this!" where I encourage passersby to draw an image or write a phrase on the unwarped grid, translate that to the warped grid, then see how it looks in the mirror reflection, thereby executing the image-translation process by hand. The ideal interaction would be for the user to observe all of the reflections in the cylindrical mirrors, then try the "try this!" activity afterward. 

During the open commentary from classmates, several people also pointed out how the cylinders were moveable and they weren't sure if the intention was to allow the museum viewer to interact directly with the exhibit by moving cylinders around. Initially that hadn't been my plan, but I feel this is an interesting possibility I hadn't considered earlier. I think there is definitely potential in encouraging viewers to move the cylinders around to discover the faces themselves, especially if the warped images don't take an obvious form without the reflection, thus allowing the user to "discover" the images. However, I should be careful to make the interactions purposeful so that users actually gain something from this exploration process. This is something I could experiment with through user testing.

Problems and Improvements: I initially wanted to use images of buildings around Stanford campus such as the Hoover Tower, but I realized that even when warped, the image was obviously that of Hoover Tower---no element of surprise. Thus I decided to use drawings instead --- sketches of faces I drew, then warping them with Photoshop. To add to the element of surprise / delight, I could try obscuring the face even further so that its integrated in to a larger picture, and you wouldn't be able to even see the anamorphism until you used the cylindrical reflector. 

* I also noticed that the vinyl tended to wrinkle when you wrapped it around the cylinders, so I had imperfect mirrored surfaces; however, it sufficed for the prototype. I would use actual cylindrical mirrors if I were to rebuild the exhibit.

* I would also experiment with the idea of encouraging users to move the cylinders (perhaps provide cylinders of different diameters) onto the images themselves to promote the idea of discovery / experimentation. However, I'm not sure if this would encourage thinking or just be too distracting / too disorganized. I would have to experimented with this and have users test it out.

* I would definitely modify the "try this!" set-up so that instead of sheets of paper with the grid and warped-grid, I would use a whiteboard or create an erasable surface with plexiglass where users could directly draw on the warped grid, erase, modify, and repeat. 

Other ideas: I had several other ideas related to light reflections from mirrors, since I find them mesmerizing, organic, and beautiful---similar how Bryan or Alon's exhibits played with light. The inspiration is from how CD-roms reflect light beautifully. One idea I initially had was to use the laser cutter to etch various cuts into the mirror (and glass as well) such as linear cuts, circular cuts, etc. Then I would reflect light off of these surfaces to see if these different cuts cast different light reflections. When I went to shop with my design the PRL TA told me the design would probably take at least an hour to cut, and I hadn't allotted enough time with the laser cutter to do so. However, this is something I'd be interested in experimenting with in the future, especially since I'm not sure how the end results will turn out (it might fail … but fail early!)

Flexible Flashlight

My exhibit is a tool for exploring how light can be curved.

Flexible flashlight!

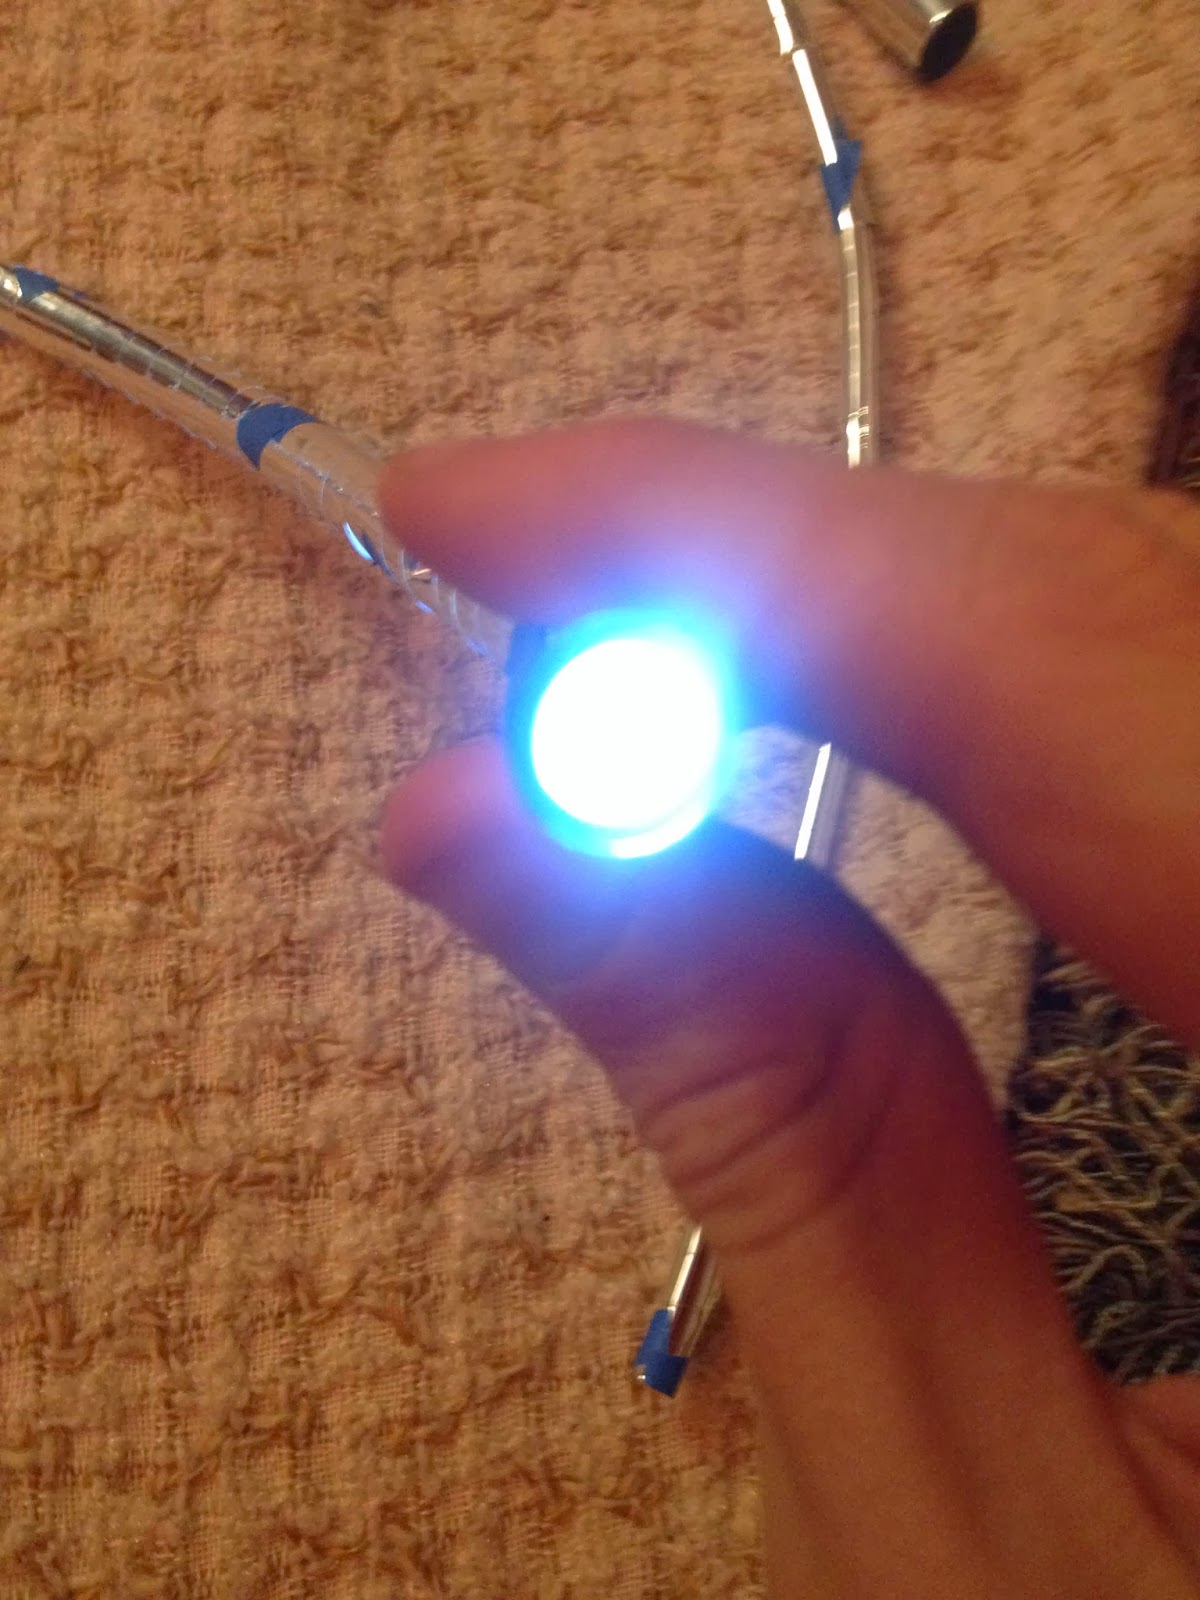
The ideal user would walk up to the exhibit, turn on the light, and peer into the end of the tube. They could then bend the tube as they looked into it, observing how the brightness of the light changes with the curvature and size of the tube. Three different tube sizes, each able to be curved however the user wishes, are provided: large, medium, and small (see pictures below).


This design was the combination of two parallel ideas I had been thinking about over the past week. First, when I saw the extra tubing in Room 36, I wanted to see if I could use them to channel water in some way that made interesting reflections. Later, I tried making a maze of mirrors, which could be solved by shining a beam of light at various points in the maze. The idea of using water ended up being too messy, and I didn't have a beam of light strong enough to complete even a simple maze (and the reflective vinyl scattered too much light). However, this generated the idea of wrapping mylar around the tubing, which ended up working well!

To refine my exhibit, I could see taking a number of routes:
1. Make all of the tubes the same length. The length of the tube is ultimately not as interesting as the ability to change its curvature; making all of the tubes identically long would remove this distraction.
2. Affix a light to each tube. Having to switch the light between tubes significantly impeded the fluidity of the experience. Similarly, if I affixed the light-end of the tubes to a fixed box, it might be easier to manipulate the tubes without holding the light in. As an added bonus, it would be easier to compare the amount of visible light in each tube.
3. Include directions. A brief explanation of things to try would be useful; multiple people said they were uncertain if bending the tubes would break the exhibit, but bending the tubes was the intended interaction!
4. Have a single size of tube fixed at various curvatures. This would reduce the interactivity of the exhibit, but might clarify the phenomenon under exploration (tube curvature rather than tube size)
5. Have the tubes shine on a piece of paper. Related to the previous idea, this would make it easier to communicate what is going on in the exhibit (tube curvature affects how much light makes it to the end of the tube), but perhaps at the cost of interactivity.
 

Assignment 2

Working Title: Many Ways of Seeing


Winnie and I right side up and upside down, respectively. 


Ideal interaction:
I want the user to put on the glasses and walk around, ideally for long enough to become somewhat accustomed to their new viewpoint and interact with the world accordingly. I was so delighted by the sudden drop in my stomach when walking out from under the low ceiling to the high, warehouse ceiling in the Exploratorium. I had adjusted just enough to my new perspective for the height difference to cause me to hesitate, and I found that really wonderful and kind of hilarious. I loved it.

Next steps: 
Walk-on-the-ceiling-glasses relaxing in Art 203.
To make this a full exhibit, I would expand and separate the effects that I combined in the glasses that I presented on Friday. I would make three (potentially more, but there are three specific effects that I think would be particularly successful) pair of glasses to be used in succession.  

The weakness of having a single pair of glasses is that the user puts them on and immediately becomes disoriented. I think the experience would be more powerful if they had other effects to compare them to side by side.

I also think that this would make it more interactive. Multiple visitors could use the glasses simultaneously and describe their experiences to
each other, walk around together, get freaked out or tripped up by different things, etc. 

Overview:
In my improved exhibit, there would be three pairs of glasses.

1) The upside down glasses. This was one component of the glasses I showed on Friday, but if reworked could deserve its own moment in the limelight. To make the effect stronger, I would make the mirror's downward angle adjustable but remove the front portion that reflected the gaze up toward the ceiling.
A small person that, distorted, looks like an ear.

2) The “walk on the ceiling” glasses. These would be similar to the glasses that I showed on Friday, but reworked for a better fit. I would rework the glasses to be less cumbersome. This would probably include making the earpieces out of plastic rather than acrylic mirror, even though
the all-acrylic aesthetic was nice (and especially because Edmark found that aesthetic misleading).

Britt's bird pecking Brian's arm. 


3)I would love to make glasses simulating the effect that Britt and Dan worked with--stereo vision? I loved their idea, but I thought that the effect would have worked better as a wearable device. When I'm at a museum and an effect takes some time to see, I'll often abandon it (I've abandoned the Cheshire cat exhibit at the Eploratorium several times, for example). I don't like being pinned to one place, waiting for something to happen. But I think when the device is wearable, I'm much happier to amble about, waiting for something to take effect or just exploring what I'm experiencing.  

Infinity mirror + mysterious black worm + blood stain 


Execution:
As mentioned, the key improvement that I would focus on would be making all three pairs of glasses less cumbersome by:
  1. Adding plastic ear pieces, rather than laser cutting them from acrylic.
  2. Adding non-slide nose padding, so that the glasses sat more stably on the nose bridge.
  3. Adding a bit of elasticity to the ear pieces, so that they hugged the head a bit more and fit snuggly enough to not have to worry about spinning or lurching.
  4. Improving the hinges on the adjustable mirrors so that they both glide smoothly and stay solidly in place once set.

Nish's Good-trip-in-a-box machine. Feat. blue masking tape.
Other reflections ideas:
For some time I've been hankering to build a sort of “infinity igloo.” Since seeing one of Kusama's infinity rooms last year (the ones Daph posted about), I've thought it would be neat to make a really physically constraining space (like an igloo) into an infinity room. Nish's infinity box (I don't know what it's called so I'm including a picture here) re-ignited the spark for me. His piece was fantastic.

What I'm envisioning is a sort of small, geodesic dome with LEDs in each corner that you could crawl into by removing a panel from the base and then replacing it somehow to leave the reflections unmarred by anything but your reflection. I saw an exhibit over the break in the Majorelle Gardens in Marrakesh (I can't find any pictures of it online) that was a sort of quasi-infinity room with really low lighting that achieved a similar effect, but again it was a really large space. Part of what would make this cool, I think, would be the perception of infinity paired with physical constraint.


Bending Mirror


My reflection exhibit was a bendable, interactive mirror.
During our exploration with reflections I really enjoyed the activity where we were told to tape two mirrors together and then play with reflections of drawings.  I thought this activity was a fun, hands-on way to learn about mirror and reflections.  I wanted to further explore the idea of multiple reflections. I thought that it would be interesting to have more than one cross section to look at the reflections and if the reflections had more than one surface to bounce off of. That is how I came up with my multiple surfaced mirror.

My idea is that the mirror would start flat and then the user could draw on it with the whiteboard markers. The user would create whatever they wanted.


Then the user would bend the mirror in different directions exploring how their designs and their designs' reflections interacted with each other.  I also wanted the user to get curious about how the multiple reflections of a mirror work.  The user would move the mirrors in different ways to create different patterns and reflections.


I think my design would have been more successful if I had done some user-testing and then a second iteration.  I also wish I had created some type of directions so users would have a better understanding of how to use the mirrors in order to get the most out of their experience.  Two of the goals of this exhibit was to be extremely interactive and open ended and I feel like those goes where successful.  For my next iteration I will add some type of directional piece.  I will also have things that are darker than the dry erase markers to make reflections, for the markers do not show up as well as I had hoped and thus the reflection interaction is not as clear as I had hoped.